> For the complete documentation index, see [llms.txt](https://guide.eprocessify.com/invoices/llms.txt). Markdown versions of documentation pages are available by appending `.md` to page URLs; this page is available as [Markdown](https://guide.eprocessify.com/invoices/invoice-items/how-do-i-create-or-add-an-invoice-item.md).

# How do I create or add an Invoice item?

Here are the steps to add an invoice item:&#x20;

**Step 1:**                                                                                                                                                                                      Navigate to settings from the navigation panel.

<figure><img src="https://2535826765-files.gitbook.io/~/files/v0/b/gitbook-x-prod.appspot.com/o/spaces%2F-MEMfXeGgsK0w2UmrDtt%2Fuploads%2FTgufSzrFQJOgnCjVhisI%2F%EF%BF%BC%20(43).png?alt=media&amp;token=b21fe366-b255-4a6e-a8cb-d6f42104210b" alt="" width="563"><figcaption></figcaption></figure>

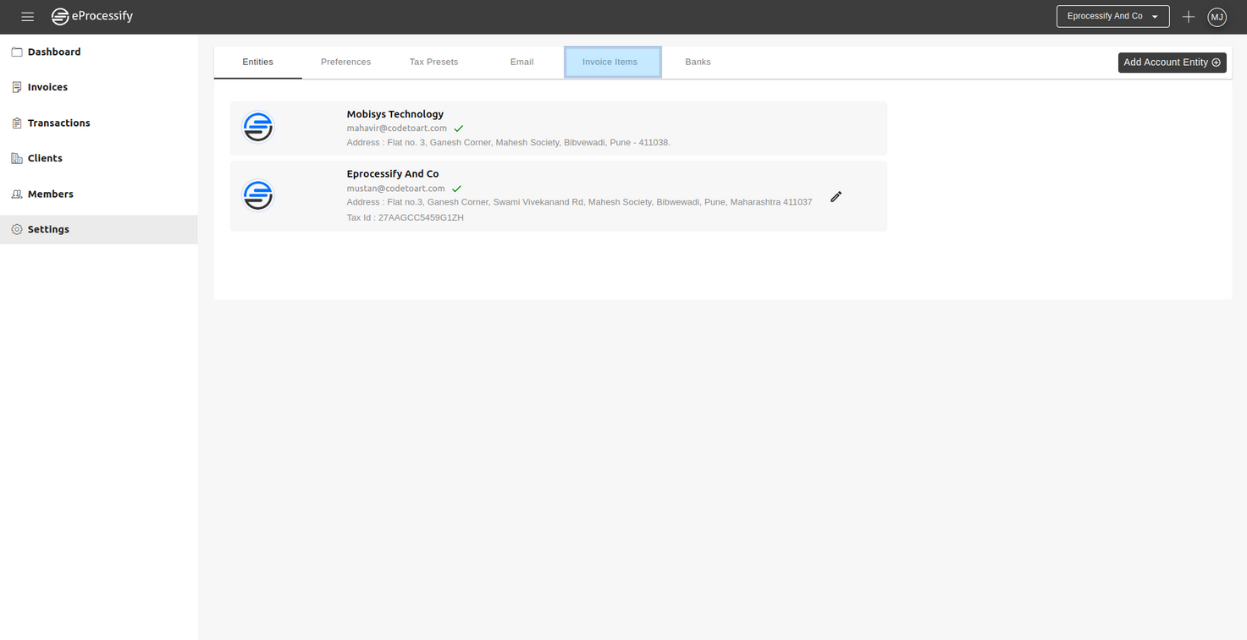
**Step 2:**                                                                                                                                                                                   Once in settings, access the 'invoice items' tab to see your existing invoice items.

<figure><img src="https://2535826765-files.gitbook.io/~/files/v0/b/gitbook-x-prod.appspot.com/o/spaces%2F-MEMfXeGgsK0w2UmrDtt%2Fuploads%2FvXydjsr3ycy4QcTiHhqp%2F%EF%BF%BC%20-%202024-05-07T151747.262.png?alt=media&amp;token=1e76ffbd-6801-4a7a-b245-3ed91874f03c" alt="" width="563"><figcaption></figcaption></figure>

**Step 3:**                                                                                                                                                                                      Within the 'Invoice Items' tab, click the 'Add invoice item' button to introduce new items.

<figure><img src="https://2535826765-files.gitbook.io/~/files/v0/b/gitbook-x-prod.appspot.com/o/spaces%2F-MEMfXeGgsK0w2UmrDtt%2Fuploads%2FRHyM4DBtDDspHVrYWYYo%2F%EF%BF%BC%20-%202024-05-07T152032.635.png?alt=media&amp;token=70bb4686-5266-40b8-8612-329b02e5ca9f" alt="" width="563"><figcaption></figcaption></figure>

**Step 4:**                                                                                                                                                                                                  Input the necessary details, then click 'save' to store the information.

<figure><img src="https://2535826765-files.gitbook.io/~/files/v0/b/gitbook-x-prod.appspot.com/o/spaces%2F-MEMfXeGgsK0w2UmrDtt%2Fuploads%2F0McwsL1xjfbCScwqyuC9%2F%EF%BF%BC%20-%202024-05-07T153416.660.png?alt=media&amp;token=e8cd3169-d3e6-4c13-817b-02e75f9cca6e" alt="" width="563"><figcaption></figcaption></figure>

This is how you can add or create an invoice item&#x20;